--

My Blog List

26.2.10

TIG Welding in Cashmere and Theo

Today was a learning experience for me, which I always enjoy in the metal shop. I tried my hand at TIG welding and it's much more difficult that MIG welding (which I've done for the past three years) but it's much more precise. So precise that I wouldn't have to grind the welds, which would cut down the amount of time I spend on the chair AND the welds will (hopefully) look beautiful.
Here are some details of my attempts. I got some pretty good welds, a little big maybe. But compared to the spotty welds...Can't you tell the difference?


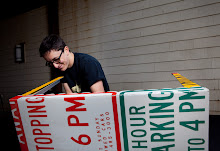
In the last five minutes of class, I realized that I hadn't featured anyone. My eyes scanned the room, for possible candidates, and there sat Theo Rosenthal. Typical of Theo, he was completely ignoring the no headphone rule in the shop, and I respected this fellow second-semester rebel in that moment. I approached him, "hey Theo, can I feature you..." He pulled off his large headphones and said, "Waaa?" I repeated myself and he consented.


Enjoy your weekend!

D

24.2.10

Chair 2, Post 2 and Ashkon

It's about time I started blogging again. The initial streak of blogs was broken by a large architectural model, which is now complete and in the lap of my teacher.

Let's not dwell on my past failure to post, here I am now with some good news. The second chair is coming along well--I've been measuring, cutting, and grinding the three (X2) pieces to specification. Then I'll take a class or two to learn TIG welding. After I've mastered the art of TIG welding, I'll try my hand and weld the two sides of the frame together.

On another note, I'm getting worried about my traffic sign supplier. He's been evasive and hasn't had a load of signs for me in a long time. Luckily, I still have a few signs left. However, one of them--the large one--isn't the best quality. It flakes and is very difficult to manipulate due to its thickness. Its color is beautiful though, so I'll have to find a creative way to incorporate it into my work. In the meantime, I'll be making new contacts. My sources will remain secret though! =]

Some great news: I've received a scholarship from the Baulines Crafts Guild for a workshop on chemical patination. The workshop looks awesome, and I'll extremely anxious to try my hand at some complex finishing processes. It also appears as if I'll be a master craftsperson's apprentice this summer, so I can hone my skills and work with an awesome teacher.

----
Today I decided to feature Ashkon Farhamgi, a junior who excelled in my architecture class last semester and is putting his knowledge of good design to use in the metal shop. His chair design incorporates the textures and patterns of the leaf into the chair back. The intricacies of the metalwork will be interesting to see pan out. Here are some of his sketches, cut list, and a snapshot of him working.

Until next time,

D


11.2.10

Chair 2, Post 1


Hey Everyone,

Today was a transition day from chair 1 to chair 2. It was spent working out the kinks in the design, creating a full-sized side profile of the chair and understanding how the cold bending machines in my shop will shape the tubing I'm using.

I tried bending one of the three pieces, but look what happened!

What seemed like a simple task--bending two pieces to the same specifications--is surprisingly difficult. I really don't know what happened here, but I don't like it one bit. I used the same tool and bent at the exact same point, yet the two pieces are markedly different. I have an inkling of what happened, so tomorrow I'll look into it.

Until then,

D

10.2.10

Chair 1, Post 6/ Rachel

The first frame is finished! Now all I need are some signs to finish the chair...


Details:
Time to fabricate: About 15 hours
Amount of tubing: About 15 feet
Height: 15-16"
Seat: 16" by 16"
Length of backing: 16" at 105 angle slant

Today, I started work on my next design:
The design is rather simple, with three long pieces, each with a single bend. However simple that sounds, the bends will be hard to coordinate, and even harder to duplicate. This design is certainly more challenging to fabricate than the first one!
==============

Today, I was speaking with some of my metalworking classmates, and one of them mentioned my blog. She said, "my goal is to make it on your blog." I smiled and even laughed aloud, not because I thought it was a ridiculous idea, but because I didn't know she was even
following this blog. As my laughing died down, I thought, "hey, why not feature my classmates' work on my blog?"

So it is with pleasure that I introduce you to Rachel Prensky-Pomeranz, a petite and always smiling sophomore--the very classmate who mentioned my blog today:
Here she is bending one side of her frame.
Rachel designed, and it now creating, a spirally based square seat, with may have a folding back feature. She was kind enough to let me snap some photos of her sketches:
I can't seem to shift this image, but the text reads:

1) Cut down metal for side panels into correct lengths (x5)
2) Bend bend bend! (x5)
3) Decide/design hinge system
4) Weld panels together! (add reinforcements)
5) Grind
6) Paint
Rachel plans with much more precision than I do, that's for sure! Feel free to leave comments for Rachel about her work.

Tomorrow I return to the metal shop. One bend at a time, I will create the second frame of this four part series.

Sincerely,

David

9.2.10

Chair 1, Post 5


This morning's metalworking session left me with a plastered smile on my face.

OK, maybe I'm exaggerating about the smiling. But I swear, I'm extremely satisfied with the work so far!

The framework of the chair is completely welded.

Some photos of the process of welding the two sides of the frame together:

The process requires a good 15-20 C clamps.

I also found the PERFECT setting for the TIG welder, which allowed me to make smooth, even welds.

Overall, a productive day. Tomorrow, I'll touch up the welds.

With the fabrication of this chair nearing completion, I am scouring for signs to rivet onto the frame. If you have any traffic signs, please contact me at djosephgoteiner@gmail.com. If I don't locate signs, I will just move onto the next frame, and leave the traffic sign component until later.

I also have the option of using wood. If you have experience with wood, please take the time to send me an e-mail with recommendations of: types of wood, ways to incorporate wood, and ways to attach the wood to the metal frame.

Cheers, and look back for more tomorrow!

David

8.2.10

Chair 1, Post 4

I got the ball rolling again today. I fine tuned some of the welds.
This weld was ground down, and then sanded. The final touch will be to smooth out the scratches and clean the whole frame.


You'll be happy to know that the "problem" I thought I had on Friday is resolved. It was a "momentary freak out."

I already have some hard-learned lessons from this project that I will post here:

1) Avoid welding in corners. The welds are difficult, if not impossible, to remove completely.
2) Use the MIG welder for fine welds, because the TIG welds can't be cleaned up as well (I will try to use MIG welder for the next three chairs!)

I'd also like to shout out Maya, Jamie, Marianela, Gary, and John for sending me constructive feedback. I take your words of advice to heart, and am already thinking of ways to incorporate your ideas into my next pieces. Thank you.

Until tomorrow,

D

5.2.10

Chair 1, Post 3

The streak ended. Today was not productive at all. I tried grinding away at a few welds to detach and re-weld one piece that was slightly off, but the welds were 1) too heavy 2) difficult to reach with the tools I was using.

The strongest word of advice I've gotten is to sleep on it. I could rip the piece to shreds and be scot free, but there's a level of responsibility in conserving the metal. My brain works in mysterious ways, and my dreams will be full of problem-solving, without my knowledge. I'll try again Monday and may have more success.

Have a good weekend!

D

4.2.10

Chair 1, Post 2

Today was another productive day. I've got this momentum going in my favor.

I welded the last piece of the frame (x2) and cut four 14 inch long pieces that will connect the two sides of the frame.
For my benefit (and yours) I also slapped some wood I found in the shops onto the unfinished frame (using clamps only) so I could sit in it. This test gave me a feel for the stability and comfort of the chair. Both stability and comfort are working for this chair. Whether you like the design is up to you though!

I also spent 25 minutes teaching a sophomore how to setup and use the cold bender, which I have some experience with. It's his first time in Metal 2, and his design is off the wall--I hope he can make it. I'm probably going to post some pictures of some of my fellow metal students' work when it develops, or is finished.
Detail of some nice welds I'll grind off in the finishing process.
I was planning on putting the whole frame together today, but I noticed that there was something off. I investigated, and I found a minor (but annoying) issue that will take me tomorrow to fix. I actually wrote down the problem in my Moleskin notebook, so I can learn from the mistake.

More tomorrow, and let me know your thoughts! djosephgoteiner@gmail.com

-DJ

3.2.10

Chair 1, Post 1

The second post on a blog may be the most important, for all I know. It means that the creation of this blog wasn't just a minute thought, an undeveloped idea. This project is more than that, I'm taking it very seriously (and having a lot of fun doing it!).
I'm actually hoping to post dozens of posts over the next few months.

Let me get to the details now. Today was my third day of fabrication on my first chair. The first day, I cut all my pieces using the full scale profile drawing I made:
The second day was mostly spent correcting an incorrect weld. I put two pieces (the 90 degree angle at the front) on the welding table, set it up correctly, made a heavier-than-I-should-have spot weld, and picked up the piece to find there was a small piece of welding wire where I welded. The small piece welded to the table pushed one of my pieces slightly off the table, resulting in a crooked weld. I thought, "Oh man, I'm off to a great start here. My first weld of the first chair..." So I spent a good 20 minutes grinding off the excess weld and setting the weld correct.
Today, I was rather productive. I angled and welded two more pieces to both sides of the frame, and the last piece of the frame is reading for tomorrow. The two sides of the frame are looking PRETTY even right now! What I mean is that both sides of the frame need to be duplicates. I laid them on top of each other-- pretttty good (Larry David reference, we love Curb Your Enthusiasm in my family).
Check back tomorrow for more photos of my progress, and perhaps some new anecdotes.

-DJG

2.2.10

Starting Up

Here's the plan. During my last semester of senior year at Lick-Wilmerding High School, I will design and create four prototype chairs in my school's metal shops. These chairs will (hopefully) be simple, sophisticated, and ergonomically sound. After fabricating two of the chairs, I will begin contacting large and small designers, design firms, and manufacturers of furniture to improve and market my designs.

My goals are:

1) To continue developing my design capabilities
2) To test my knowledge of the metal shop, and challenge myself to learn new techniques
3) To explore the design world: make contacts, meet friends, and pick up "design" smarts
4) MOST IMPORTANTLY, to succeed in bringing a comfortable, well-designed chair to the MASSES. I hate seeing designer chairs for $4,000 dollars, which sometimes aren't even functional. These chairs will be for the people, not for a large profit or my ego.

Feel free to email me at djosephgoteiner@gmail.com with suggestions, contacts, or questions!

I'll be posting sporadically, so subscribe to the blog/RSS feed!

David Joseph-Goteiner